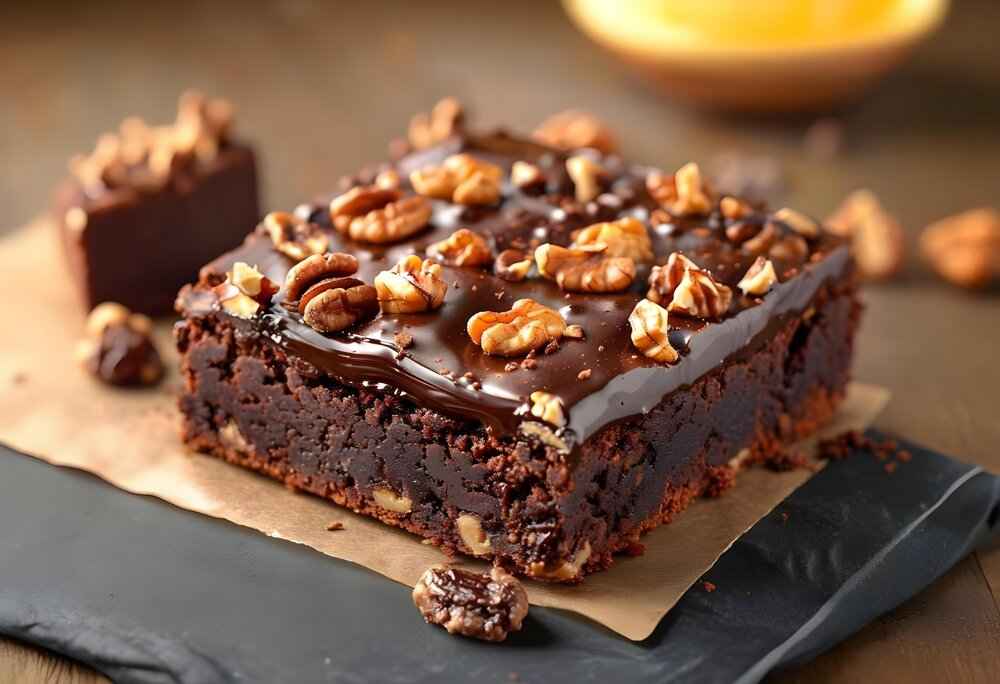
Walnut brownies are the ultimate indulgence for chocolate lovers. With a rich, fudgy texture and the satisfying crunch of walnuts, these brownies offer the perfect balance of flavor and decadence. Whether you’re an experienced baker or just starting out, this step-by-step guide will show you how to make perfect walnut brownies that will impress everyone who tastes them. Plus, we’ve included everything you need to know, including the ingredients, time, and even calorie count!
Prep Time: 15 minutes
Cook Time: 30 minutes
Total Time: 45 minutes
Calories per Serving: 220
Table of Contents
- Ingredients You’ll Need
- Step-by-Step Instructions to Make Walnut Brownies
- Tips for Making the Best Fudgy Walnut Brownies
- How to Customize Your Walnut Brownies
- Storing and Serving Walnut Brownies
- Conclusion
Ingredients You’ll Need
To bake walnut brownies, you need to start with the right ingredients. Quality ingredients are key to creating rich, fudgy brownies with the perfect texture. Here’s a handy table with the essential ingredients:
| Ingredient | Amount |
|---|---|
| Walnuts (chopped) | 1 cup (120g) |
| Cocoa Powder | 1/2 cup (50g) |
| Butter (melted) | 1/2 cup (115g) |
| Granulated Sugar | 1 cup (200g) |
| Eggs | 2 large |
| All-Purpose Flour | 1/2 cup (65g) |
| Baking Powder | 1/2 teaspoon |
| Vanilla Extract | 1 teaspoon |
| Salt | 1/4 teaspoon |
| Dark Chocolate (chopped) | 100g |
These ingredients are simple, but they come together to create a rich, fudgy texture that will make your walnut brownies irresistible.
Step-by-Step Instructions to Make Walnut Brownies
Making walnut brownies from scratch is easier than you might think. Follow these simple steps to create brownies that are rich, fudgy, and packed with the crunch of walnuts.
1. Preheat & Prepare Your Pan
Start by preheating your oven to 350°F (175°C). Grease an 8×8-inch square baking pan with butter or cooking spray, and line it with parchment paper to make sure the brownies don’t stick.
2. Mix the Wet Ingredients
In a large bowl, melt your butter in the microwave or on the stove. Once the butter is melted, add your sugar and vanilla extract, and whisk until the mixture is smooth and combined. Incorporate your eggs one at a time, making sure to thoroughly mix after each addition.
3. Fold in the Dry Ingredients
In a separate bowl, sift together the flour, cocoa powder, baking powder, and salt. Slowly add the dry ingredients to the wet mixture, stirring gently to combine. Be careful not to overmix; this will help keep your brownies fudgy and soft.
4. Add Walnuts and Chocolate
Once the batter has been thoroughly mixed, include the chopped walnuts and dark chocolate into the mixture. The walnuts give your brownies the perfect crunch, while the dark chocolate enhances the richness. Stir until just combined, ensuring the nuts and chocolate are evenly distributed.
Tips for Making the Best Fudgy Walnut Brownies
To get walnut brownies that are perfectly fudgy and not too dry, follow these expert tips:
1. Use High-Quality Chocolate
For the best results, use high-quality dark chocolate. This will add depth to the flavor of your walnut brownies and create a rich, indulgent taste. You can also use semi-sweet or bittersweet chocolate depending on your preference.
2. Don’t Overmix the Batter
Overmixing the batter can result in dense brownies that are more cake-like. To avoid this, stir the ingredients just until they are combined, leaving a few lumps if necessary.
3. Check the Baking Time
Every oven is different, so keep an eye on your brownies while they’re baking. After 25 minutes, check for doneness by inserting a toothpick into the center. If it comes out with a few moist crumbs (but not wet batter), your walnut brownies are done. If needed, bake for another 3-5 minutes.
How to Customize Your Walnut Brownies
Walnut brownies are incredibly versatile. While the classic recipe is always a winner, there are plenty of ways to make them your own. Here are some great ideas for customizing your walnut brownies:
1. Add More Nuts
If you love nuts, feel free to swap walnuts for other varieties like pecans, almonds, or even macadamia nuts. These nuts will bring their own unique texture and flavor to the brownies.
2. Go for a Swirl
Try adding a swirl of peanut butter, caramel, or Nutella to the batter before baking. This creates a beautiful marbled effect and adds an extra layer of flavor to your walnut brownies.
3. Make Them Gluten-Free
For a gluten-free version of walnut brownies, simply substitute the all-purpose flour with a gluten-free flour blend. Be sure to check the ingredients on the flour package to ensure it’s suitable for your dietary needs.
Storing and Serving Walnut Brownies
Once your brownies are baked and cooled, it’s time to store and serve them. Here are some tips to keep your brownies fresh and serve them in the best way:
How to Store Walnut Brownies
Store your walnut brownies in an airtight container at room temperature for up to 4-5 days. Keeping them in the refrigerator for up to a week is an option if you want to ensure that they remain fresh for a longer period of time. For longer storage, wrap individual brownies in plastic wrap and freeze them for up to 3 months.
Serving Suggestions
Walnut brownies are perfect on their own, but you can take them to the next level with some delicious toppings. Serve them warm with a scoop of vanilla ice cream or drizzle with melted chocolate sauce for extra indulgence.
Reheating Tips
To enjoy your walnut brownies warm, simply pop them in the microwave for 10-15 seconds or reheat them in the oven at 350°F (175°C) for 5-10 minutes. This will restore their fudgy, melt-in-your-mouth texture.
Conclusion
Making the perfect walnut brownies is easier than you think! By following these simple steps and tips, you can create brownies that are rich, fudgy, and packed with the satisfying crunch of walnuts. Whether you’re making them for a special occasion or just as a treat for yourself, these walnut brownies are sure to be a hit.
Don’t forget to experiment with different nuts and flavor swirls to make them your own. And if you have any extra, store them for later so you can enjoy the indulgence for days to come!


