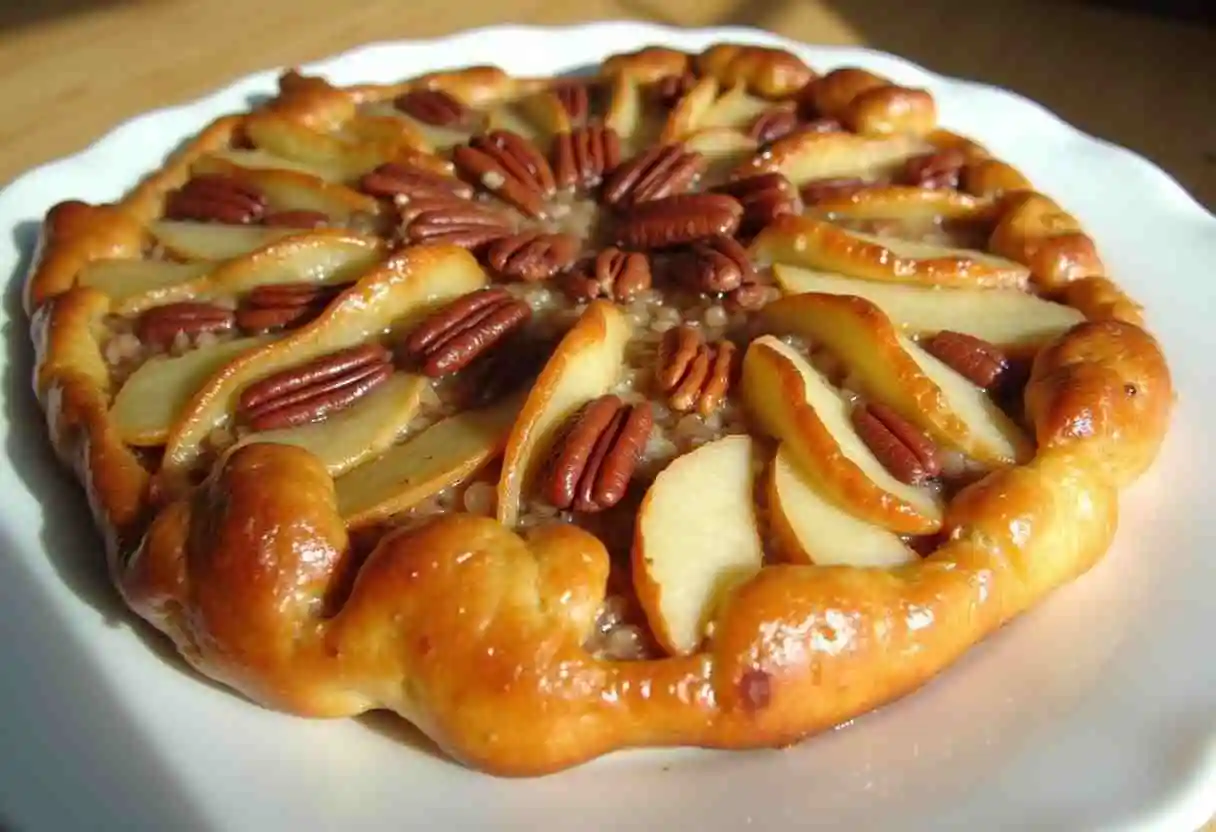
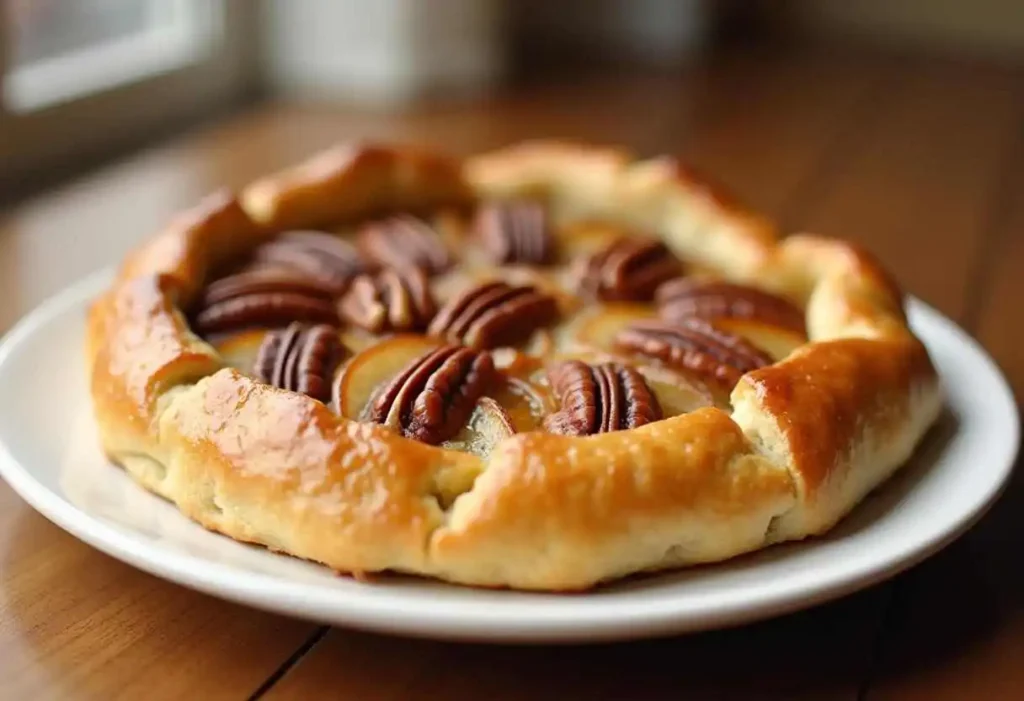
Are you looking for a delicious dessert that’s simple to make yet impressive enough for any occasion? Look no further! This easy recipe for apple and pecan Danish pastry tart combines the crisp sweetness of apples, the nutty crunch of pecans, and the flaky perfection of puff pastry. Whether it’s a family gathering, holiday celebration, or cozy brunch, this tart is guaranteed to delight everyone.
Table of Contents
- Recipe Overview:
- Ingredients Needed for Apple and Pecan Danish Pastry Tart
- Step-by-Step Instructions to Make the Perfect Apple and Pecan Danish Pastry Tart
- Tips for Customizing Your Apple and Pecan Danish Pastry Tart
- Serving and Storing Apple and Pecan Danish Pastry Tart
- Why This Danish Pastry Tart Recipe Stands Out
- Exploring the History and Popularity of Danish Pastry Tarts
- Fun Variations and Experimentations
- FAQ About Apple and Pecan Danish Pastry Tart
Recipe Overview:
- Prep Time: 20 minutes
- Cook Time: 30 minutes
- Total Time: 50 minutes
- Servings: 6-8 slices
- Calories: Approximately 320 calories per serving
Ingredients Needed for Apple and Pecan Danish Pastry Tart

Having the right ingredients is essential for nailing this apple and pecan Danish pastry tart recipe. Here’s a quick breakdown of everything you’ll need:
| Ingredient | Quantity |
|---|---|
| Puff pastry sheet | 1 sheet (thawed) |
| Apples (Granny Smith or Honeycrisp) | 2 medium (peeled, cored, and sliced thinly) |
| Pecans | ½ cup (chopped) |
| Brown sugar | ½ cup |
| Unsalted butter | 2 tbsp (melted) |
| Ground cinnamon | 1 tsp |
| Nutmeg (optional) | ½ tsp |
| Vanilla extract | 1 tsp |
| Egg (for egg wash) | 1 (beaten) |
| Powdered sugar (for glaze) | ½ cup |
| Milk (for glaze) | 2 tbsp |
Ingredient Highlights for Apple and Pecan Danish Pastry Tart:
- Apples: Choose firm, slightly tart varieties like Granny Smith or Honeycrisp to balance the sweetness.
- Pecans: Toast them lightly for extra flavor.
- Puff Pastry: Store-bought puff pastry keeps things quick and easy while still delivering that flaky, golden crust.
Step-by-Step Instructions to Make the Perfect Apple and Pecan Danish Pastry Tart

Follow these simple steps to create your apple and pecan Danish pastry tart with ease:
Preparing the Filling for Apple and Pecan Danish Pastry Tart:
- Slice the Apples: Peel, core, and thinly slice the apples to ensure even cooking. Thin slices also allow for better layering on the tart.
- Combine Ingredients: In a mixing bowl, toss the apple slices with brown sugar, cinnamon, nutmeg (if using), and vanilla extract. Let the mixture sit for 5-10 minutes so the flavors meld together.
- Toast the Pecans: Lightly toast the chopped pecans in a dry pan over medium heat for 2-3 minutes. This enhances their nutty flavor.
Assembling the Apple and Pecan Danish Pastry Tart:
- Prepare the Puff Pastry: On a lightly floured surface, roll out the thawed puff pastry sheet to the desired size and thickness. Place it on a parchment-lined baking sheet.
- Layer the Filling: Arrange the apple slices in overlapping rows down the center of the puff pastry, leaving a border around the edges. Sprinkle the toasted pecans evenly over the apples.
- Fold the Edges: Fold the edges of the puff pastry over the filling to create a border. Press gently to seal.
- Brush with Egg Wash: Brush the folded edges with beaten egg to ensure a golden, shiny crust when baked.
Baking the Apple and Pecan Danish Pastry Tart:
- Preheat the Oven: Set your oven to 375°F (190°C) and allow it to fully heat up before baking.
- Bake: Place the tart in the preheated oven and bake for 25-30 minutes, or until the puff pastry turns golden brown, crisp, and flaky. Keep an eye on it during the final few minutes to ensure it doesn’t over-bake, as this will affect the texture and flavor. The apples should be tender, and the pecans lightly toasted, creating the perfect balance of flavors. Once done, remove the tart from the oven and let it cool slightly on the baking sheet before transferring it to a serving platter.
- Cool: Allow the tart to cool on the baking sheet for about 10 minutes. This resting time helps the pastry set, ensuring it stays crisp and flaky when served. Cooling also allows the apple and pecan filling to settle, making it easier to drizzle the glaze without it melting or sliding off. Once cooled slightly, transfer the tart to a serving platter or cutting board before proceeding with the glaze for a polished, finished look.
Adding the Glaze to Your Danish Pastry Tart:
- Make the Glaze: Combine powdered sugar and milk in a bowl, stirring until the mixture is smooth and free of lumps. Adjust the consistency as needed.
- Drizzle: Using a spoon, drizzle the glaze over the cooled tart for a beautiful finishing touch.
Tips for Customizing Your Apple and Pecan Danish Pastry Tart
Ingredient Swaps for Your Apple and Pecan Danish Pastry Tart:
- Try Different Nuts: Swap pecans for walnuts or almonds for a unique flavor profile.
- Add Cranberries: Sprinkle dried cranberries over the apples for a festive, tart twist.
- Use Other Fruits: Replace apples with pears, peaches, or mixed berries to suit the season.
Healthier Options for Danish Pastry Tarts:
- Whole Wheat Puff Pastry: Use whole wheat puff pastry for added fiber.
- Reduce Sugar: Cut the sugar in half or substitute with a natural sweetener like honey or maple syrup.
- Lighter Glaze: Skip the glaze or use less milk for a thinner drizzle.
Presentation Ideas:
- Rustic Look: Keep the edges of the puff pastry uneven for a rustic, homemade appearance.
- Fancy Plating: Dust powdered sugar over the entire tart before slicing for a polished finish.
Serving and Storing Apple and Pecan Danish Pastry Tart
Best Ways to Serve:
- Warm with Ice Cream: Serve slices warm with a scoop of vanilla ice cream.
- With Whipped Cream: A dollop of whipped cream adds a light, creamy contrast to the tart.
- Drizzle with Caramel Sauce: Enhance the flavor by drizzling caramel sauce over the tart before serving.
- Pair with Coffee or Tea: This tart pairs wonderfully with a warm beverage, making it perfect for brunch or afternoon tea.
- If you’re enjoying this tart with a beverage, consider pairing it with a refreshing Boba Smoothie for a fun and unique combination.
How to Store:
- Refrigeration: Store leftover tart in an airtight container in the fridge for up to 3 days.
- Freezing: Freeze the baked tart for up to 2 months. Reheat in the oven to restore crispiness.
Reheating Tips:
- Use a toaster oven or conventional oven to reheat and maintain the crisp texture of the puff pastry.
- Avoid using the microwave, as it tends to make the puff pastry lose its crispness and become soggy.
Why This Danish Pastry Tart Recipe Stands Out
Perfect for Any Occasion:
Whether you’re hosting a holiday dinner or enjoying a quiet brunch, this apple and pecan Danish pastry tart fits the bill. Its rich flavors and flaky texture make it a standout dessert.
Simple Ingredients, Elegant Results:
Despite using readily available ingredients, this tart looks and tastes like something you’d find in a high-end bakery.
Reader-Friendly Tips:
Have you tried this recipe? Share your own tips, tweaks, or results in the comments below! We’d love to hear how you made this recipe your own.
Exploring the History and Popularity of Danish Pastry Tarts
The Origins of Danish Pastry:
Danish pastry, also known as “wienerbrød,” originated in Denmark but was inspired by Austrian baking traditions. The flaky, buttery dough became a global favorite, lending itself to various fillings and flavors.
Why Apple and Pecan is a Perfect Pairing:
The combination of sweet apples and crunchy pecans has long been a classic in desserts. The natural sweetness of apples complements the buttery richness of pecans, making it an ideal choice for this tart.
Seasonal Appeal:
This recipe is especially popular in the fall and winter months when apples are in season, and warm desserts are a comforting treat. However, it’s versatile enough to enjoy year-round.
Fun Variations and Experimentations
Mini Danish Pastry Tarts:
Turn this recipe into individual servings by cutting the puff pastry into smaller rectangles or circles. Assemble and bake as instructed for bite-sized treats perfect for parties.
Savory Danish Tarts:
Experiment with savory flavors by replacing apples and pecans with ingredients like goat cheese, caramelized onions, and spinach. Danish pastry is incredibly versatile and works for both sweet and savory dishes.
Add a Modern Twist:
Incorporate trendy flavors like salted caramel, maple syrup, or chai spices to give this classic dessert a modern update.
FAQ About Apple and Pecan Danish Pastry Tart
Is it possible to use homemade puff pastry for this apple and pecan Danish pastry tart recipe?
Absolutely! While store-bought puff pastry is quicker and easier, homemade puff pastry will provide an even more buttery and flaky texture. Just ensure you chill it well before use.
What’s the best way to prevent the pastry from getting soggy?
To avoid a soggy pastry, ensure the apples are sliced thinly and not overly juicy. You can also sprinkle a thin layer of breadcrumbs or ground nuts on the pastry before adding the filling to absorb excess moisture.
Can I make this tart ahead of time?
Yes, you can prepare the tart a few hours in advance and bake it just before serving. Alternatively, you can bake it ahead and reheat it in the oven for 5-10 minutes before serving.
How do I toast pecans properly?
To toast pecans, place them in a dry skillet over medium heat and stir frequently for 2-3 minutes until they become fragrant. Be careful not to burn them.
Can I freeze this tart after baking?
Yes, the baked tart freezes well. Wrap it tightly in plastic wrap and foil before freezing. To reheat, bake it in a 350°F oven until warmed through and crispy.
Can I substitute pecans with other nuts?
Definitely! Walnuts, almonds, or even hazelnuts are great alternatives to pecans. Adjust the quantity to suit your taste.
This easy recipe for apple and pecan Danish pastry tart is a must-try for anyone who loves combining sweet, nutty, and flaky textures in one bite. With its simple preparation, versatile customization options, and stunning presentation, it’s a dessert you’ll find yourself making again and again. Give it a try, and let us know how it turned out in the comments below. Don’t forget to share this recipe with friends and family who’d enjoy it too!